
1. 下載Automated Redpill Loader Img檔
RROrg/rr
Github:https://github.com/RROrg/rr
Github Releases:https://github.com/RROrg/rr/releaseswjz304/arpl-i18n (已棄用)
Github:https://github.com/wjz304/arpl-i18n
Github Releases:https://github.com/wjz304/arpl-i18n/releases
fbelavenuto/arpl (已棄用)Github:https://github.com/fbelavenuto/arpl
Github Releases:https://github.com/fbelavenuto/arpl/releases
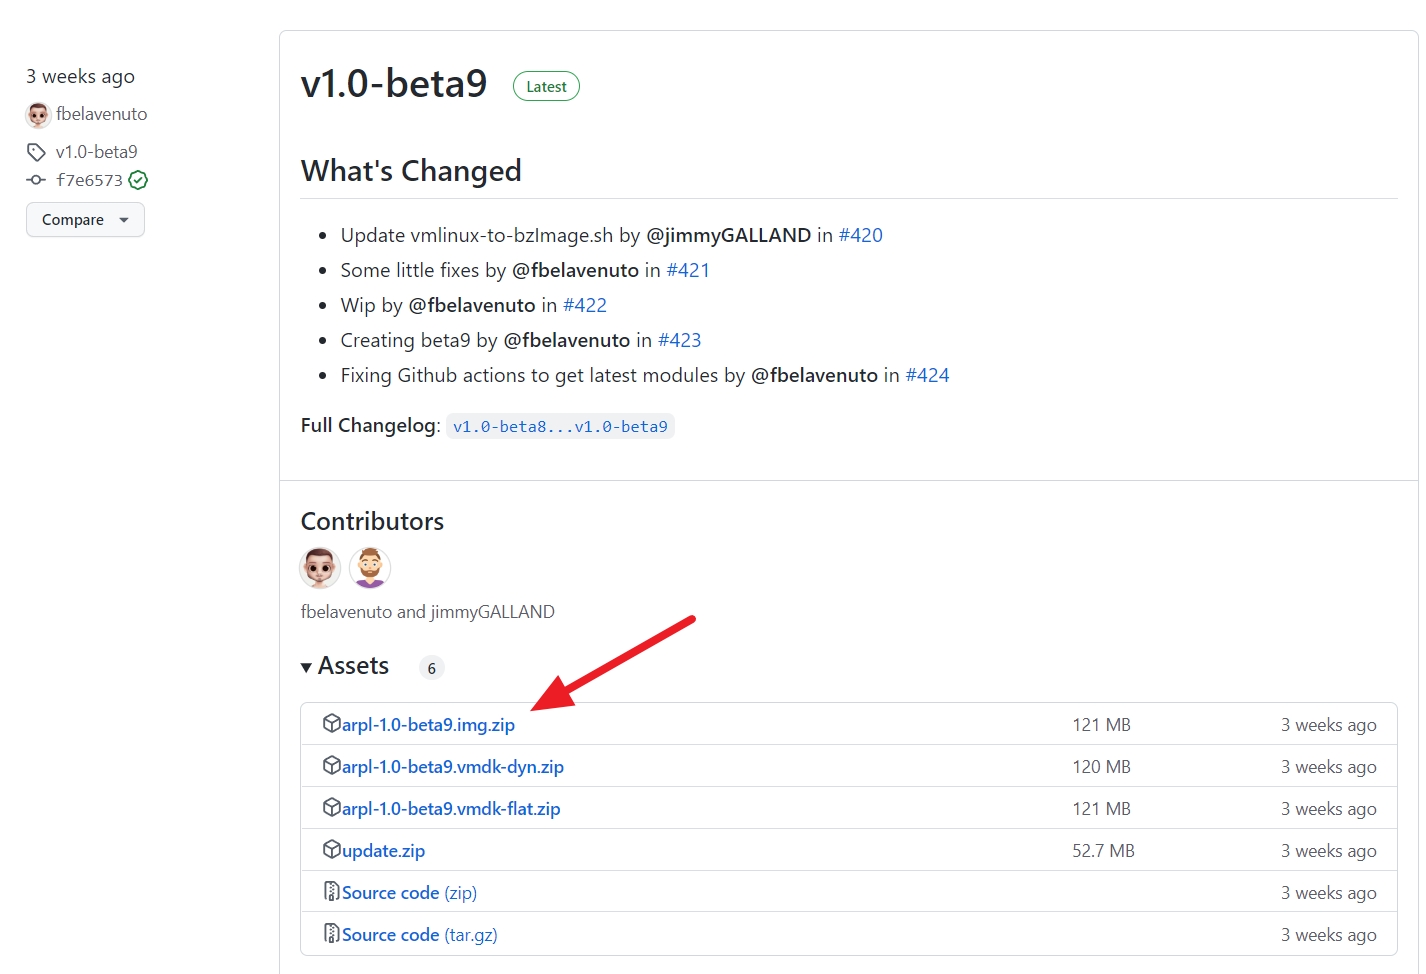
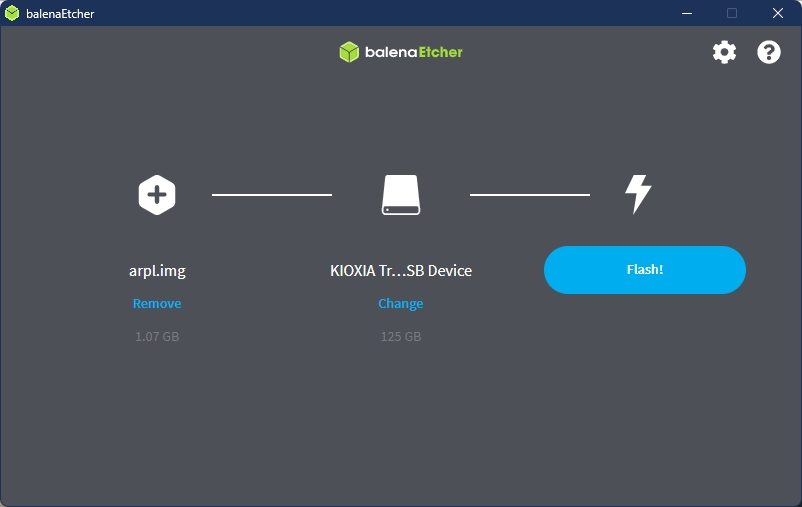
2. 解壓縮ZIP後得到Img檔,並將Img寫入USB隨身碟
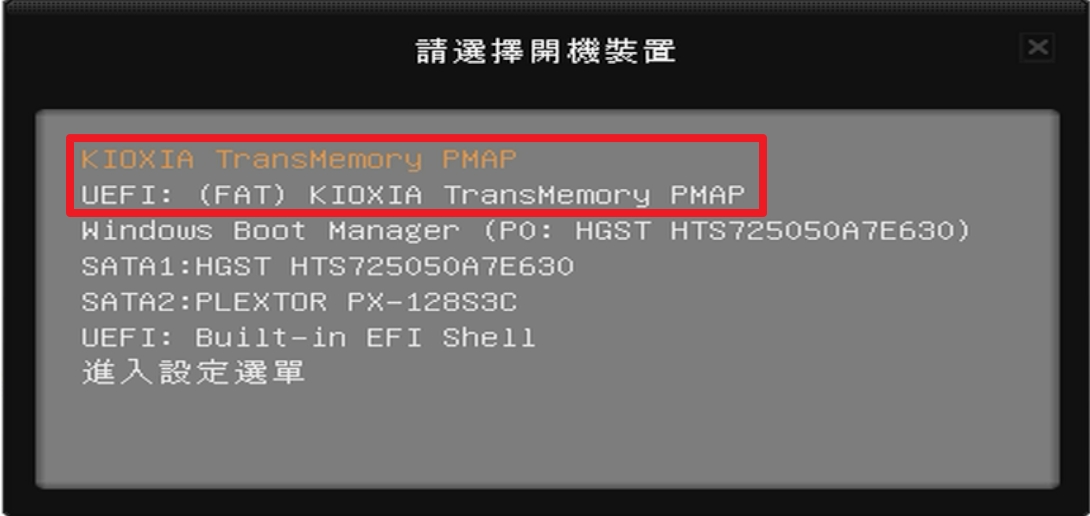
3. 將USB隨身碟插入電腦,並選擇USB隨身碟開機
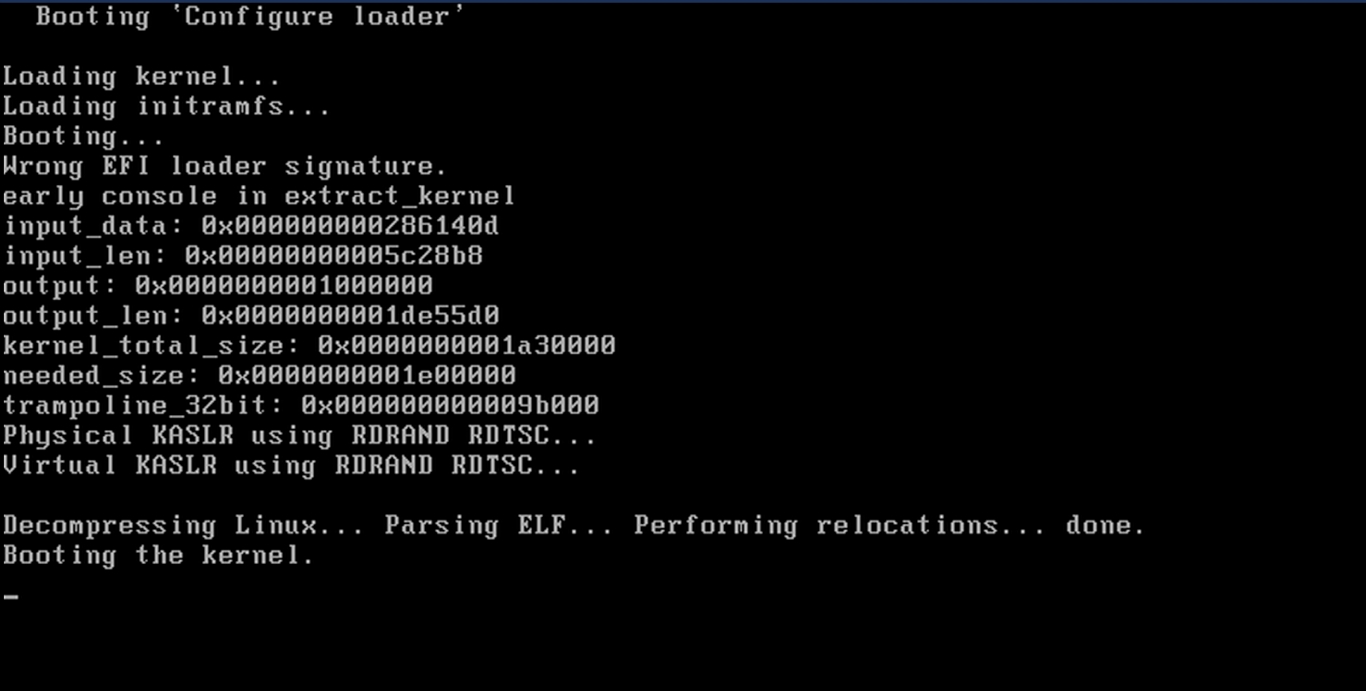
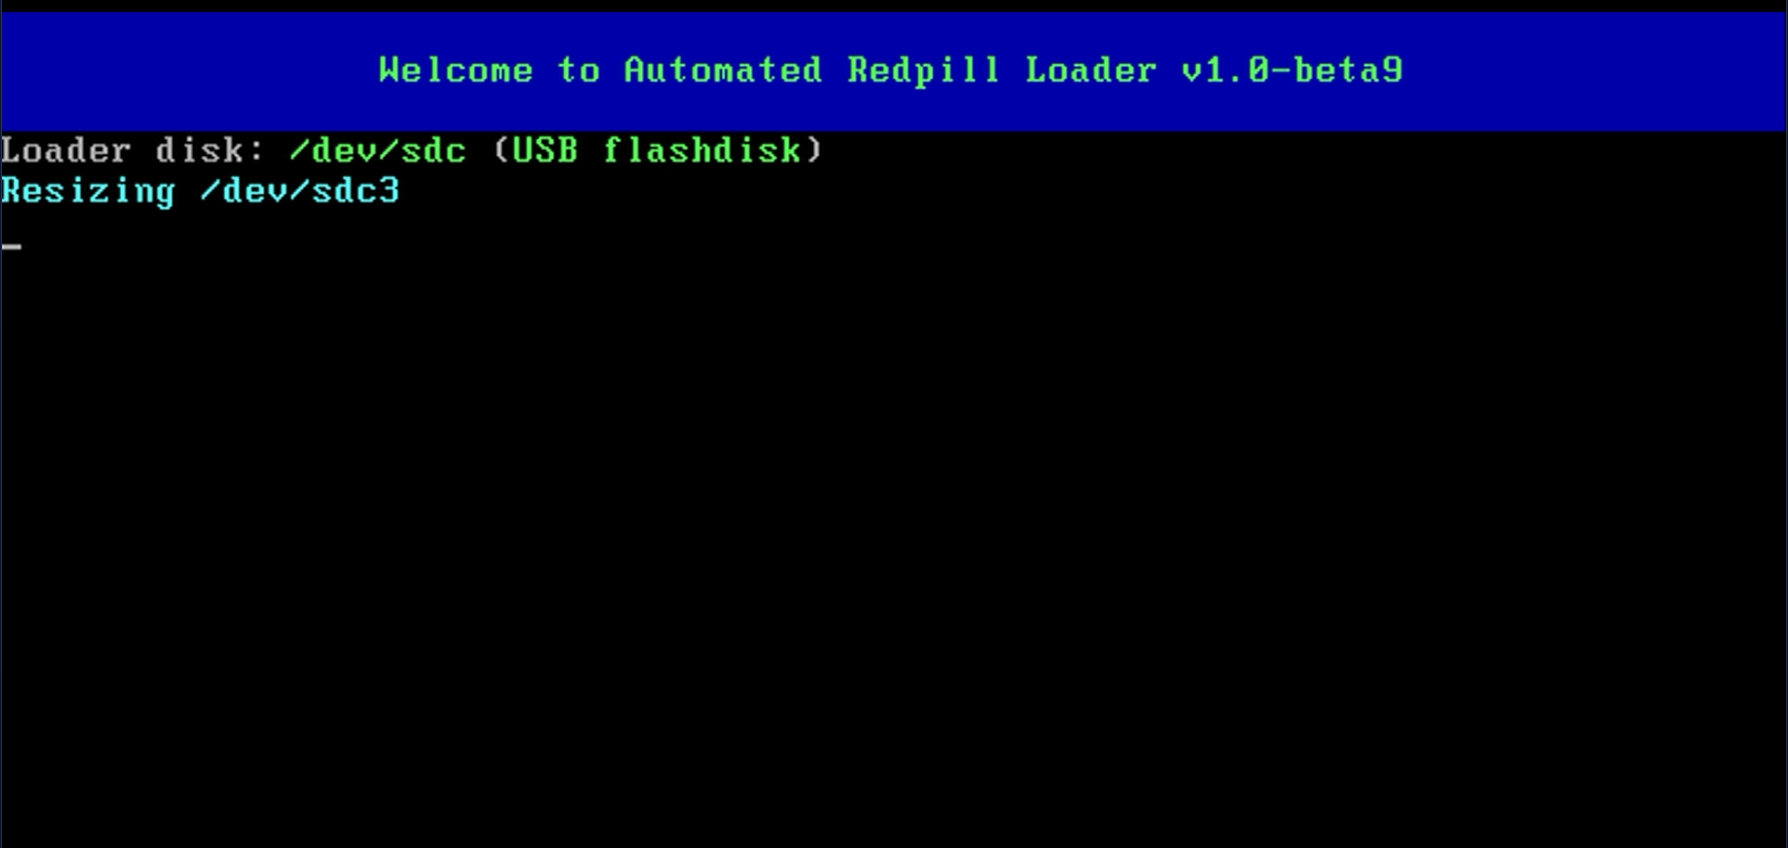
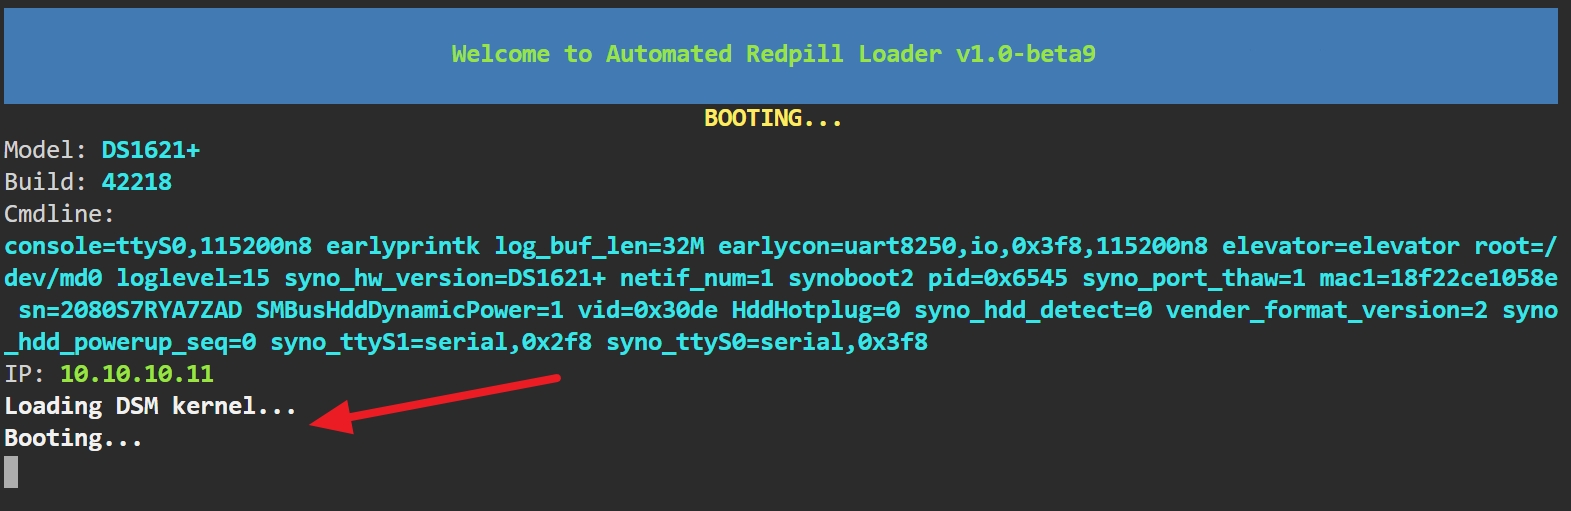
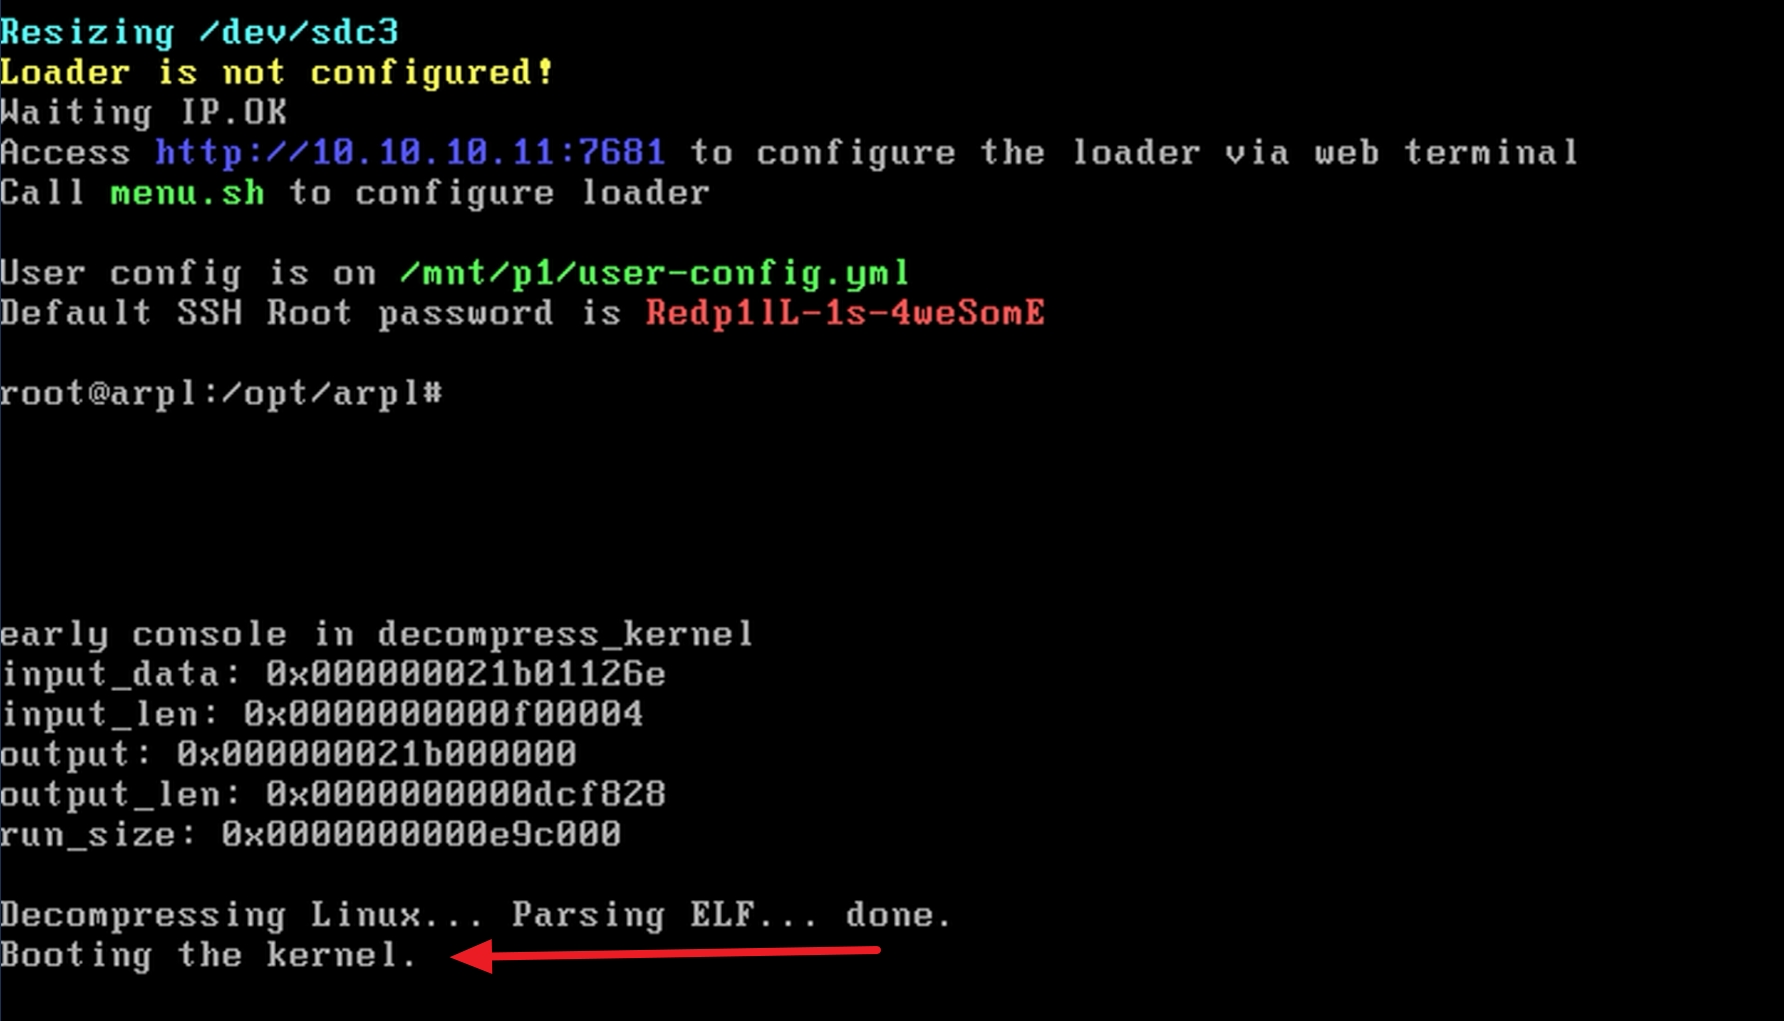
4. 載入ARPL中、調整分區中
5. 載入完成後會透過DHCP獲取一組IP
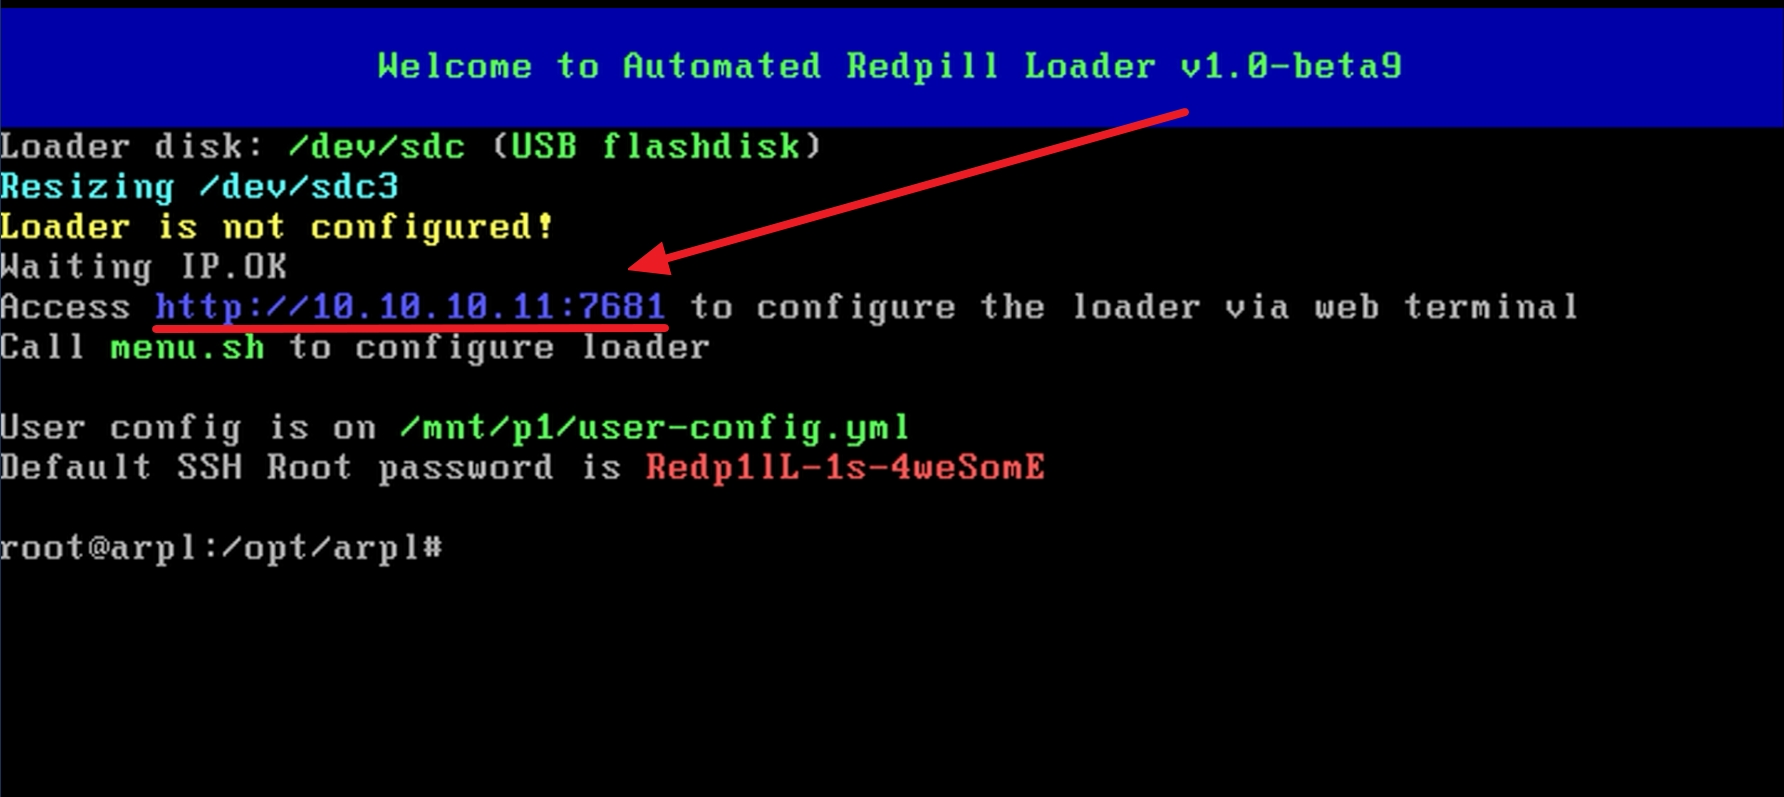
6. 使用同一區網下的電腦輸入此網址
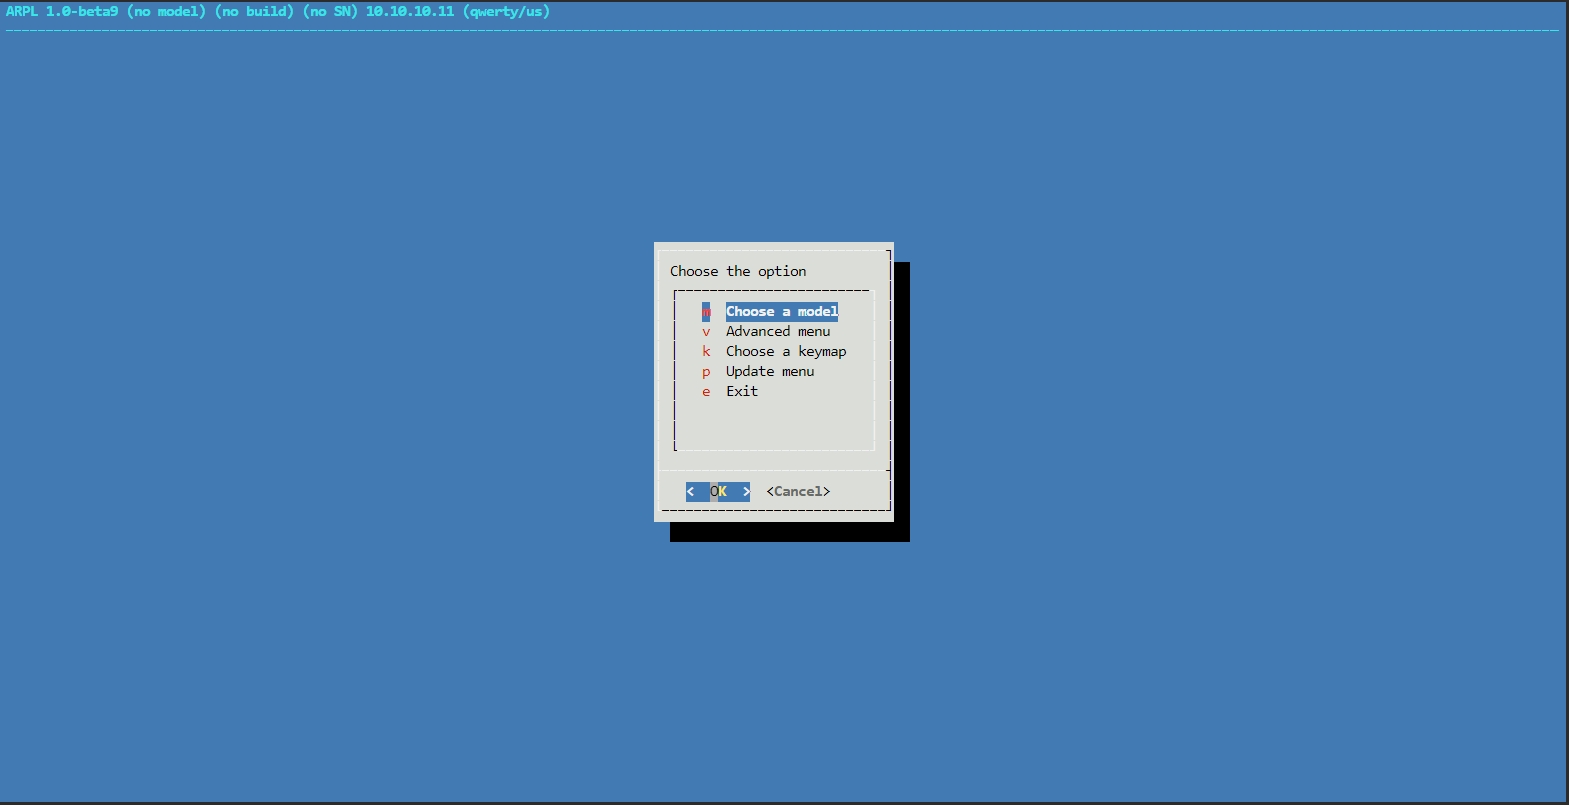
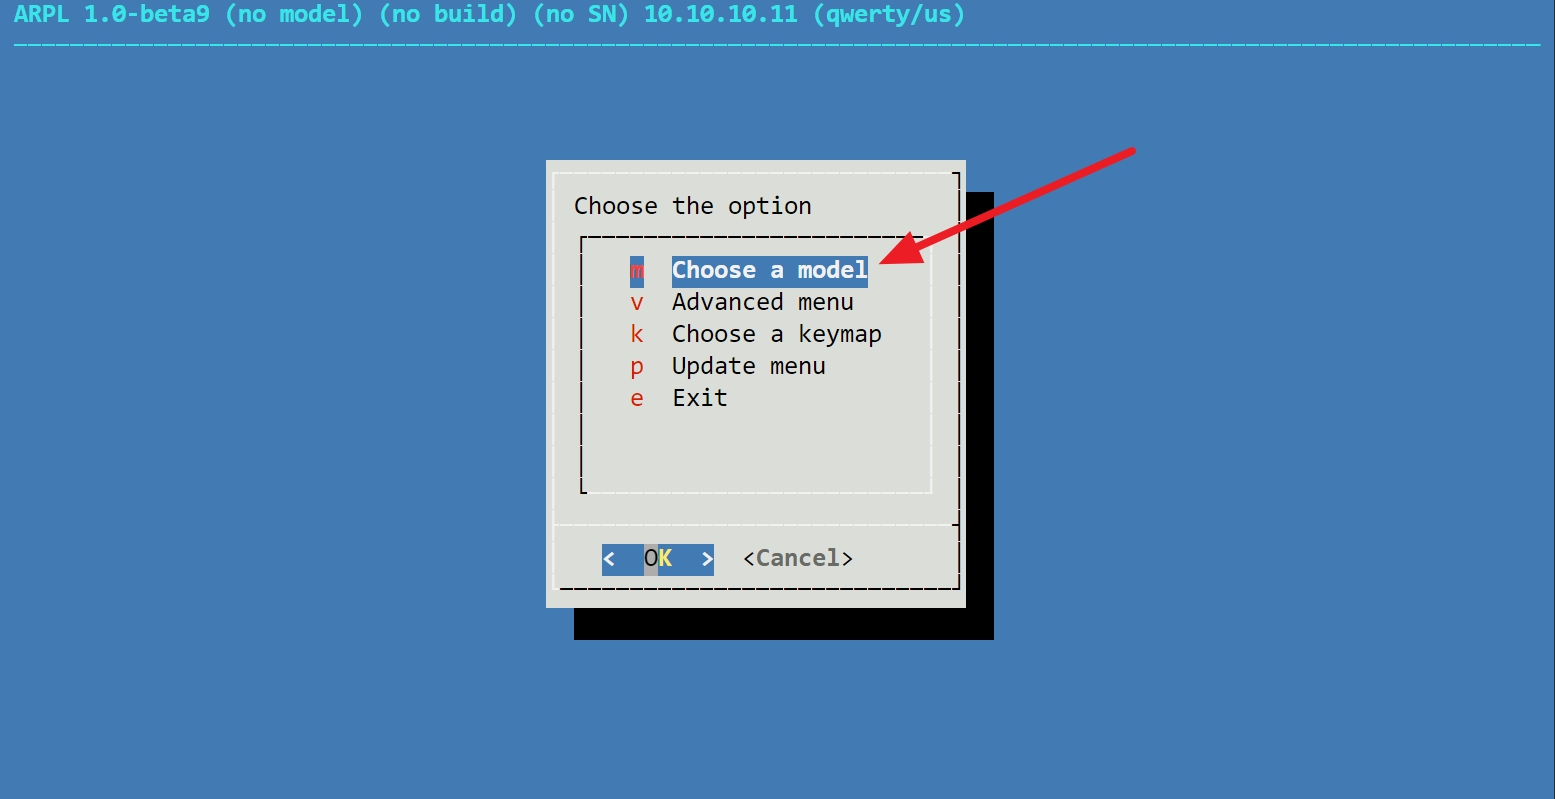
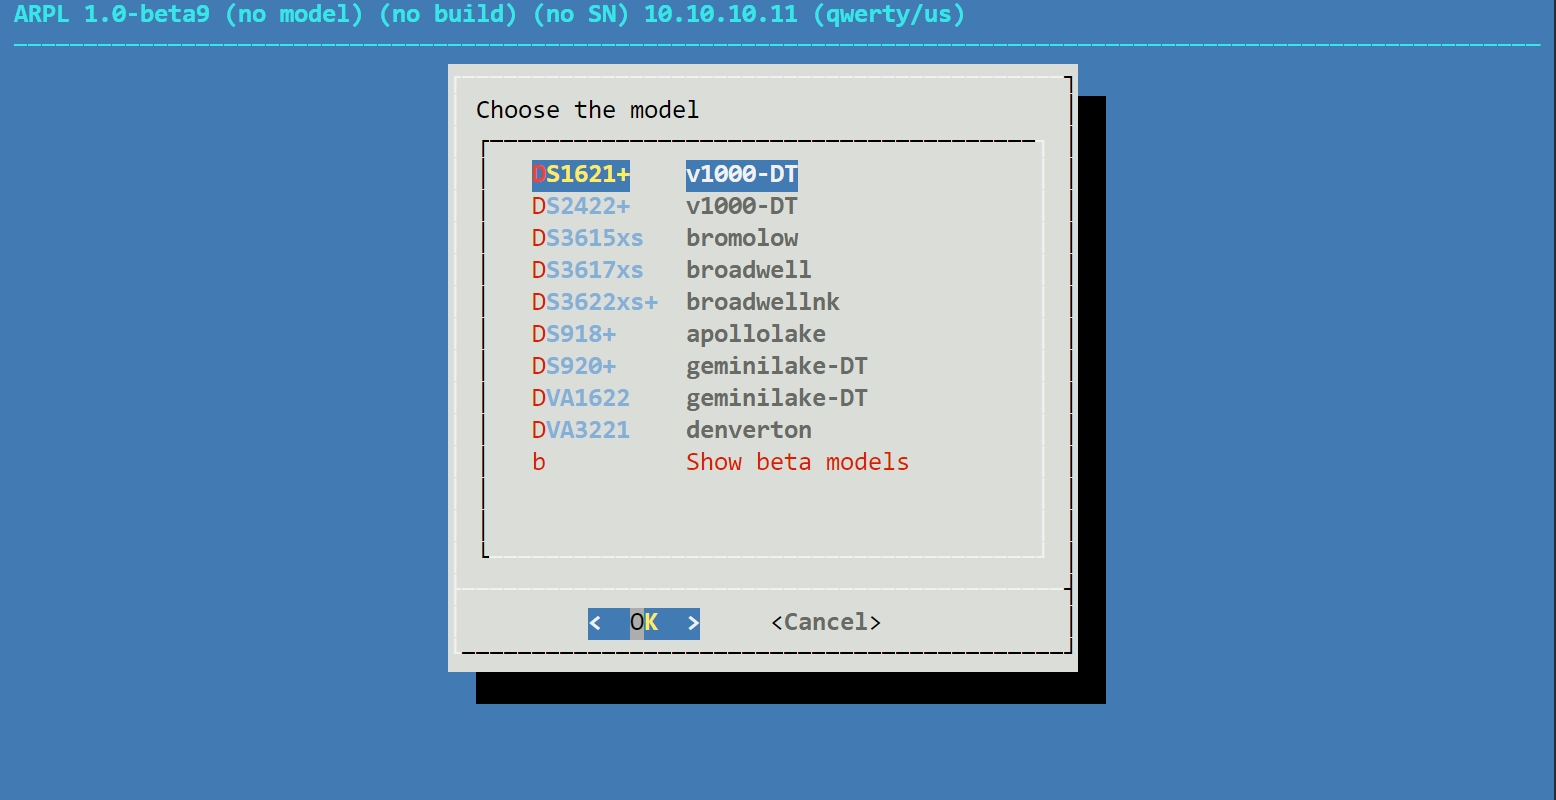
7. 選擇機型
使用方向鍵,選擇到 “Choose a model” 這個選項後,按下Enter進入。(也可以使用滑鼠點選)
這邊使用DS1621+做演示,選好後按下Enter即可。
如果CPU不支援FMA3,則部分機型不會顯示在此清單中。
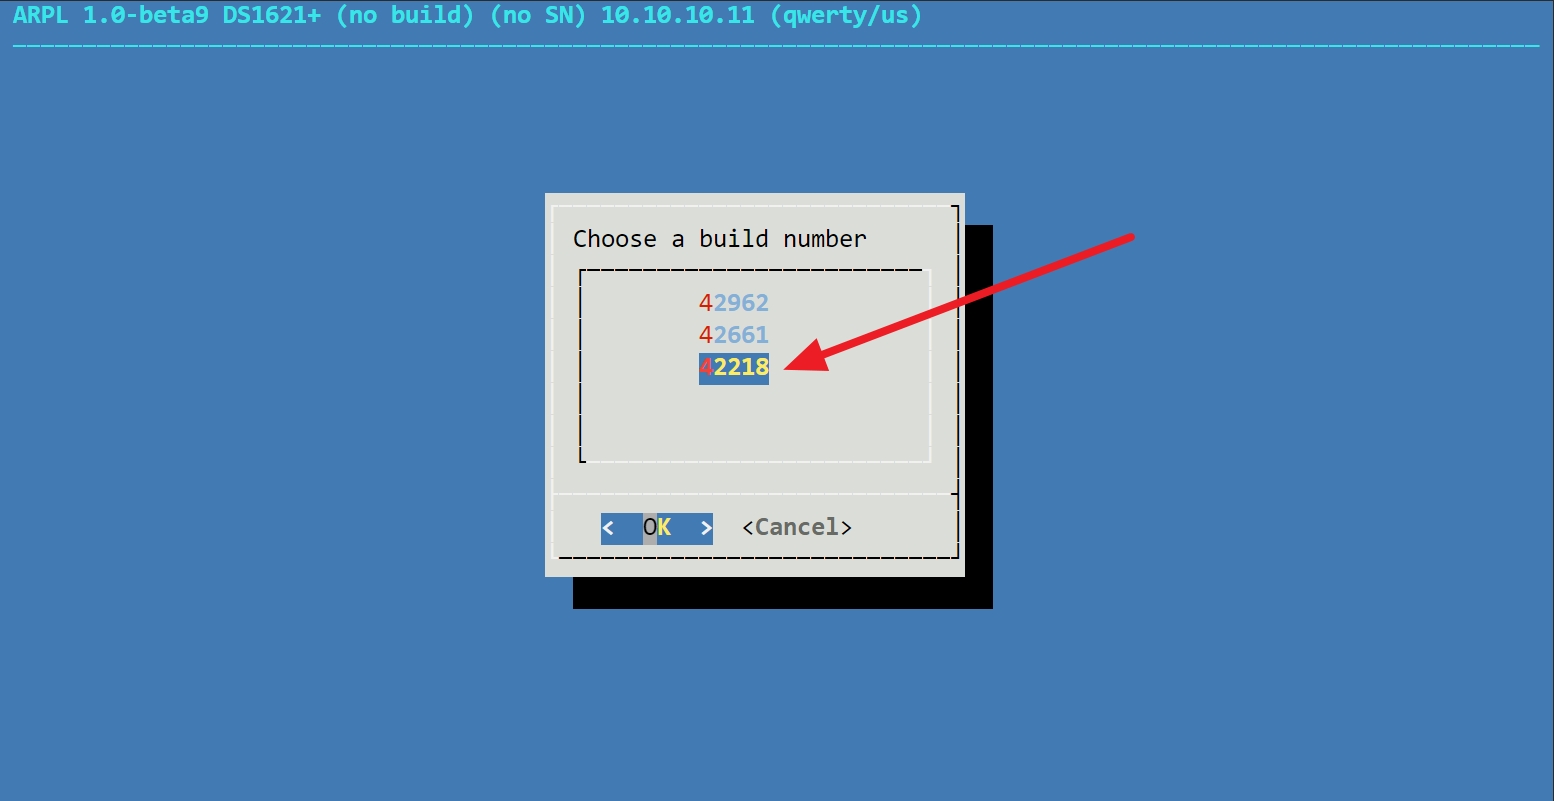
8. 選擇版本
使用方向鍵,選擇到”Choose a Build Number”這個選項後,按下Enter進入。

這裡使用 42218 這個版本號做演示,選好後按下Enter即可。。
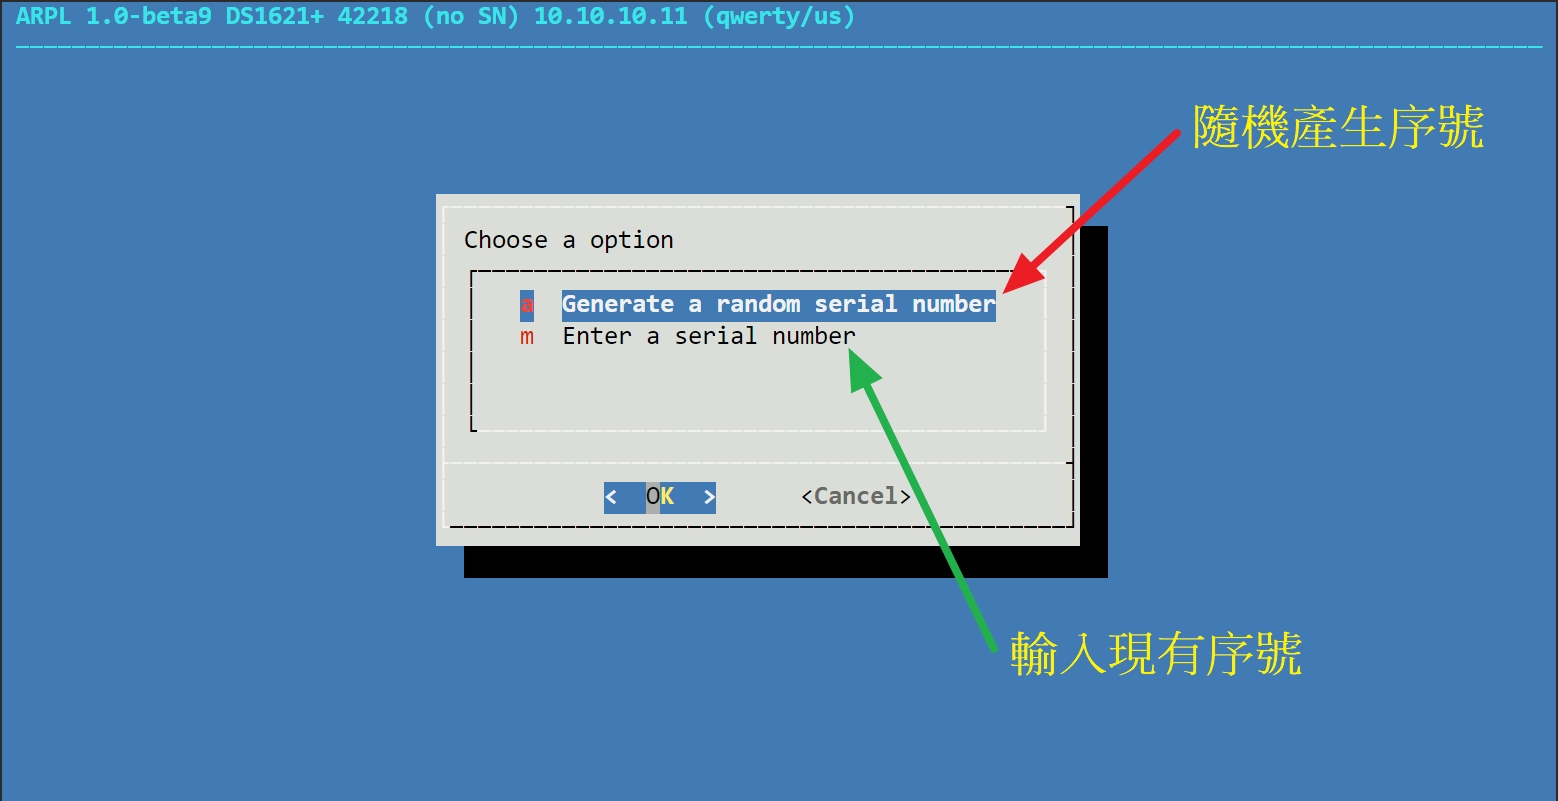
9. 產生序號或填入現有序號
使用方向鍵,選擇到”Choose a Serial Number”這個選項後,按下Enter進入。

紅色為產生一組序號,綠色為填入一組現有序號,這裡以隨機產生序號做演示。
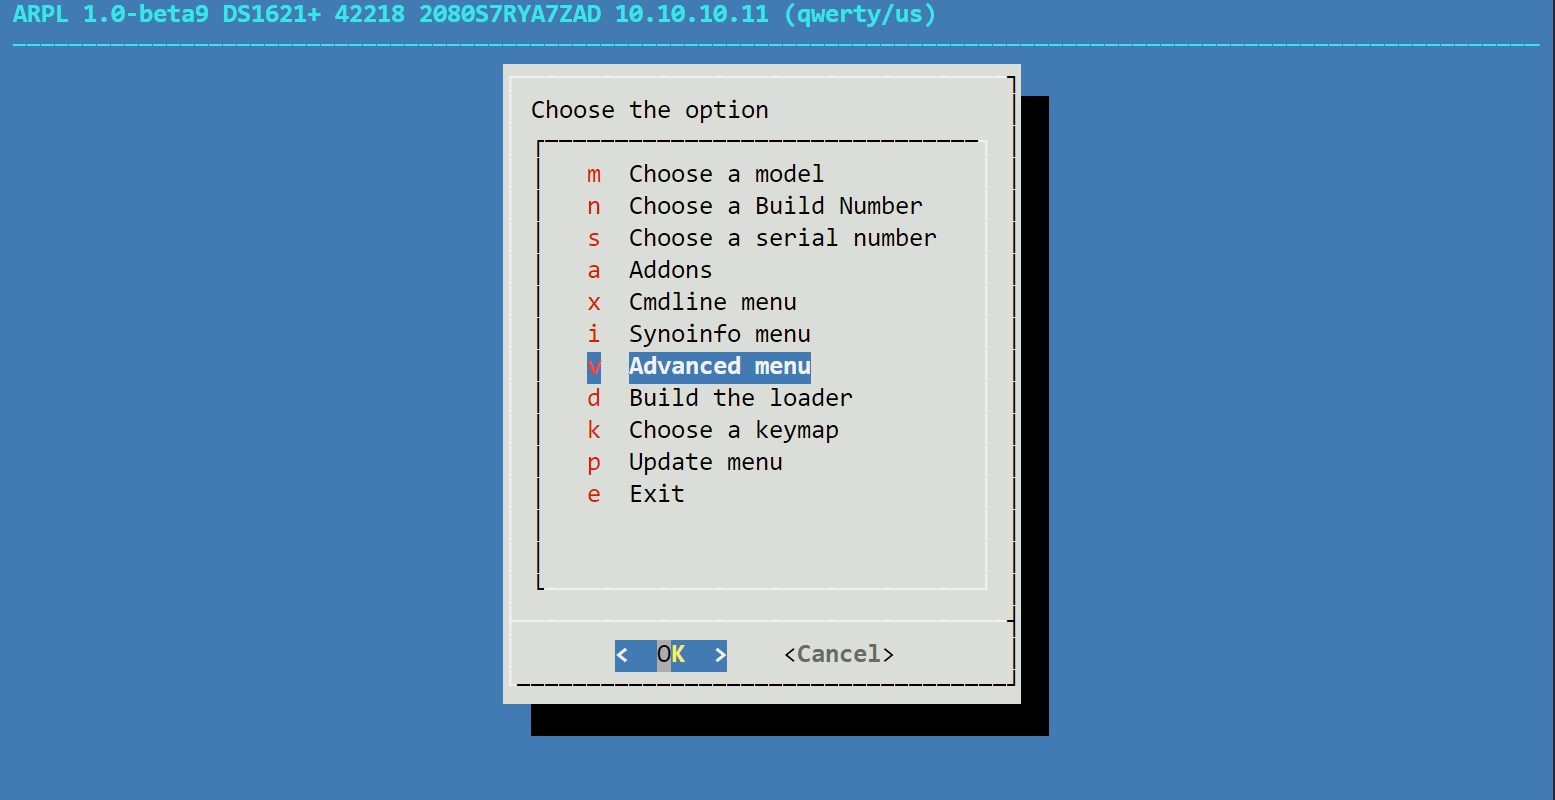
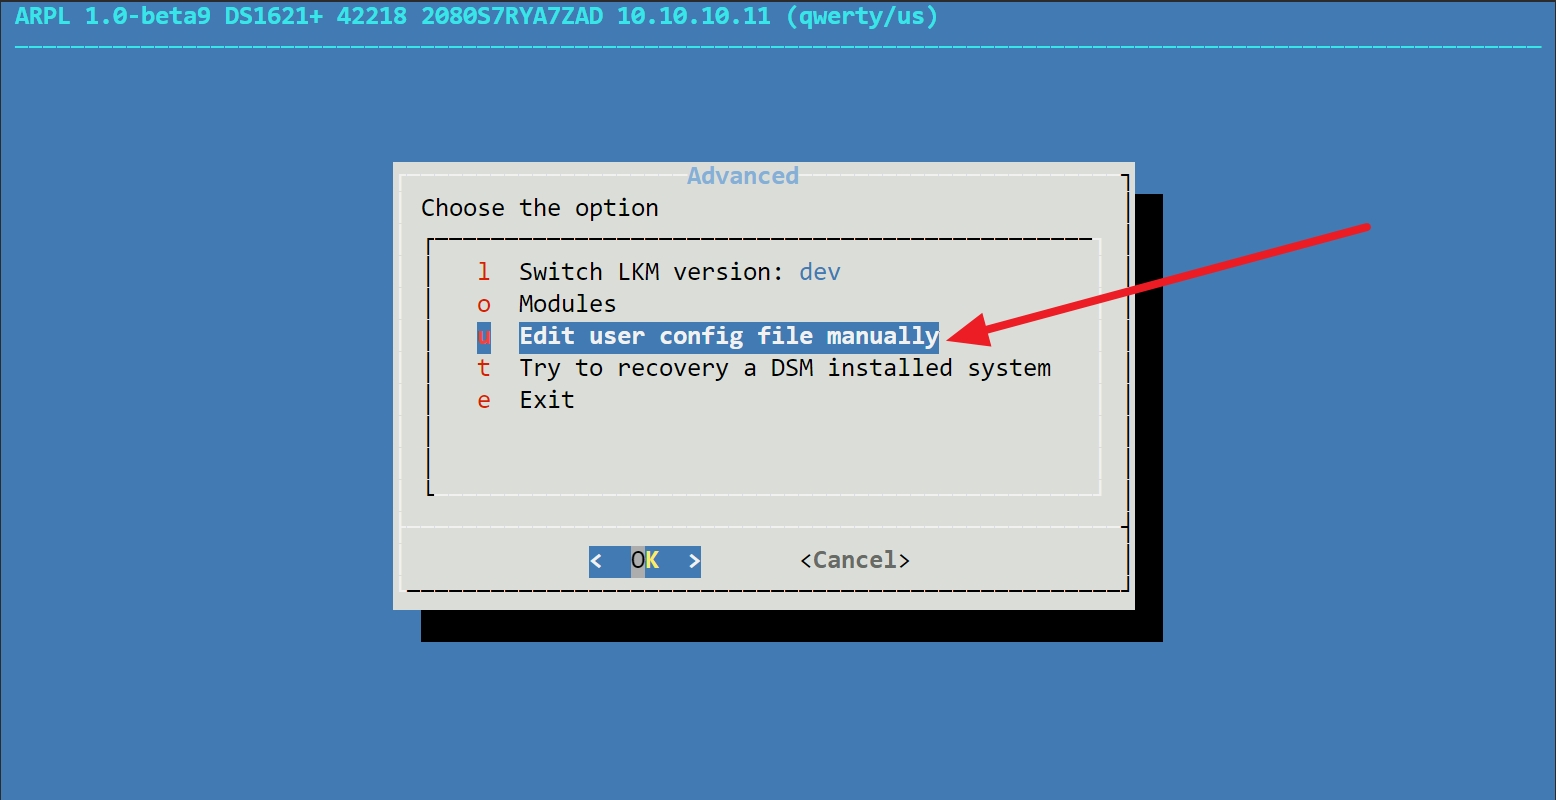
10. 手動編輯(可跳過)
如需手動編輯Config,可以進入 “Advanced Menu” 下的 “Edit user config file manually” 做更改。

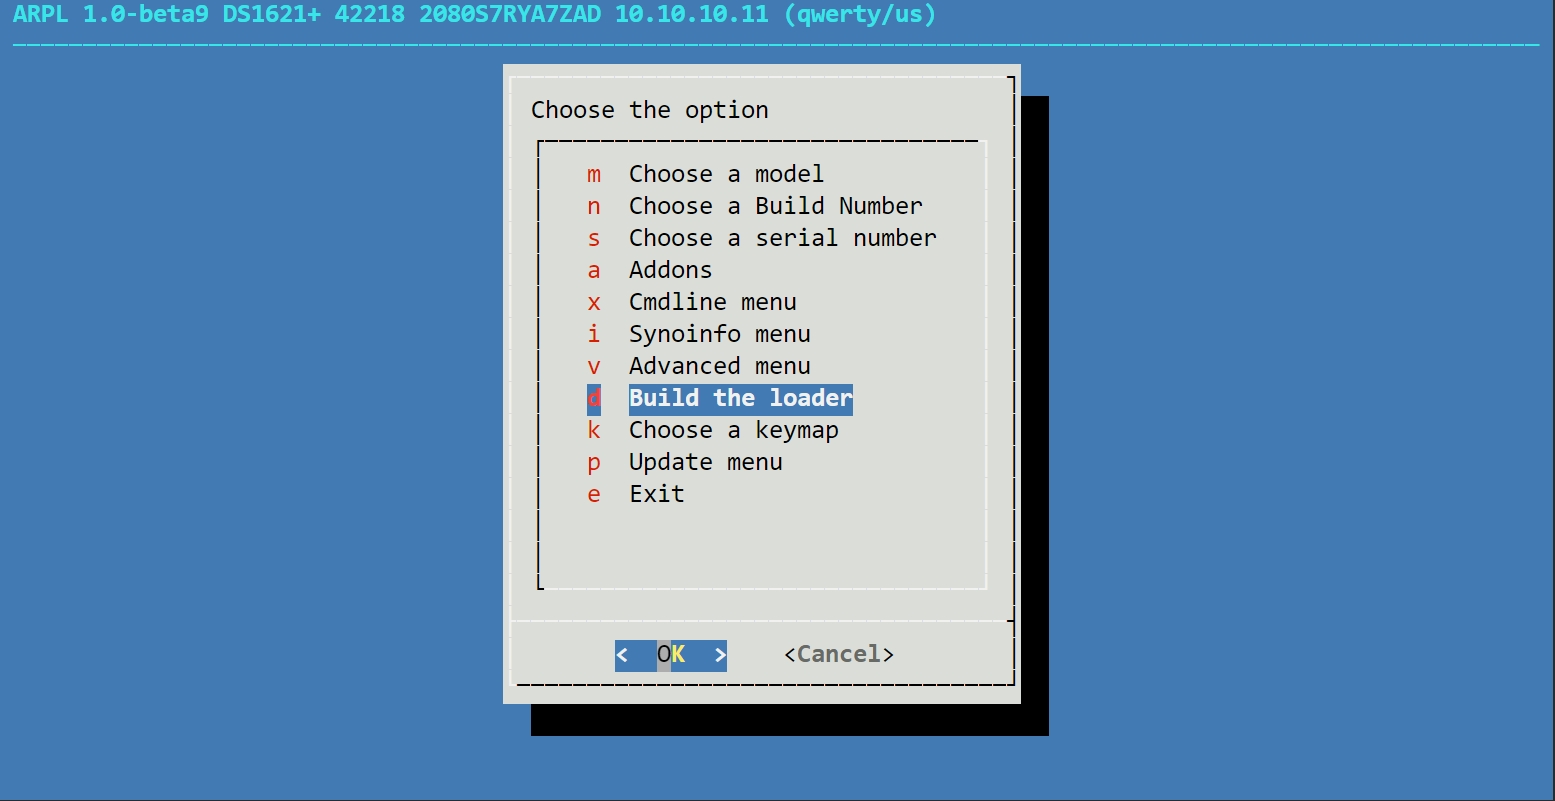
11. 編譯引導
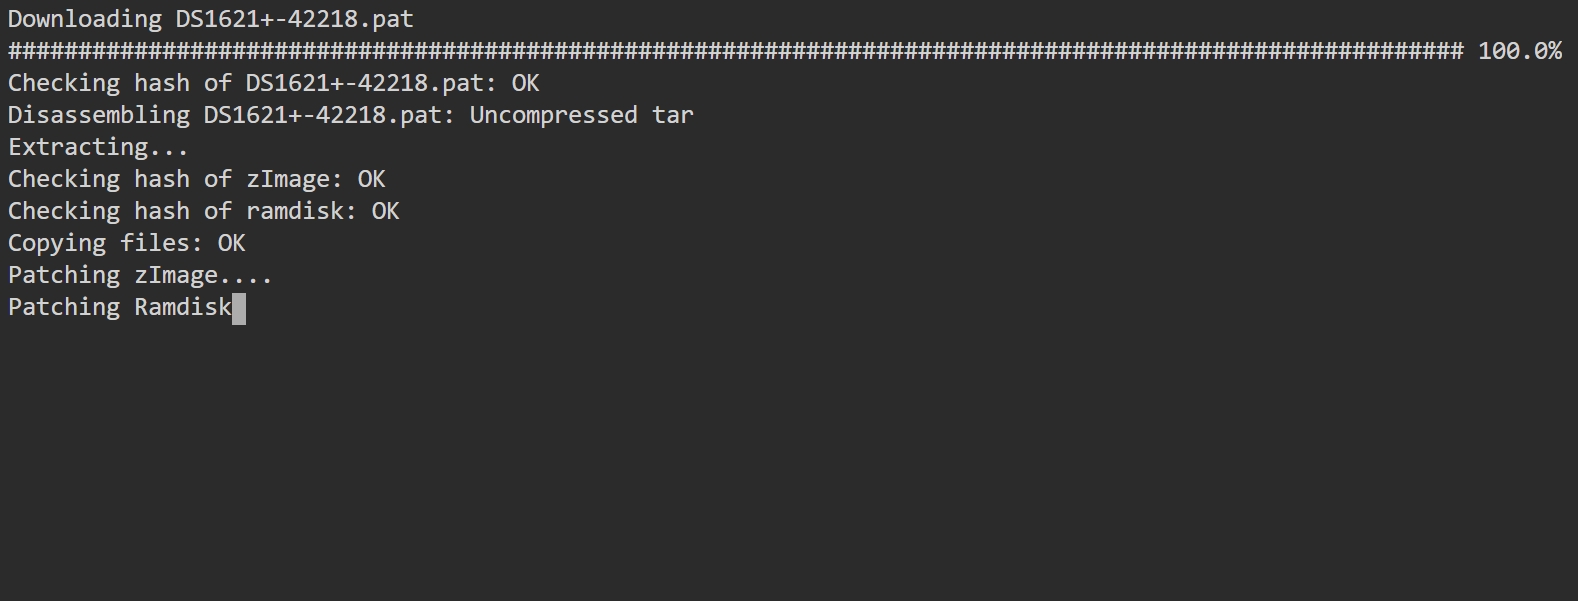
使用方向鍵,選擇到 “Build the loader” 這個選項後,按下Enter進入,編譯完成後會回到上一層的選單。
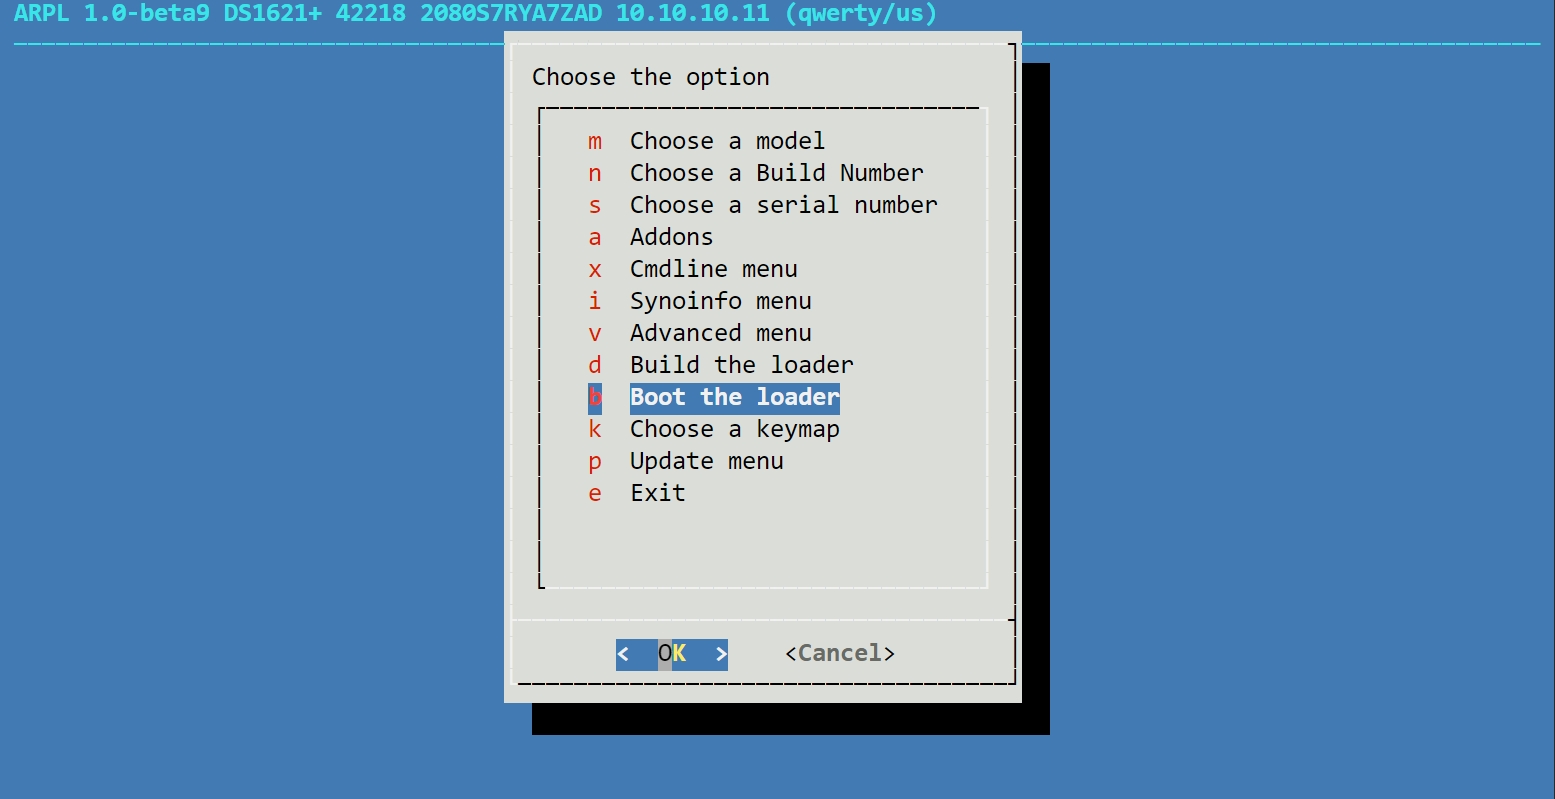
12. 啟動引導
使用方向鍵,選擇到 “Boot the loader” 這個選項後,按下Enter就會開始引導DSM。
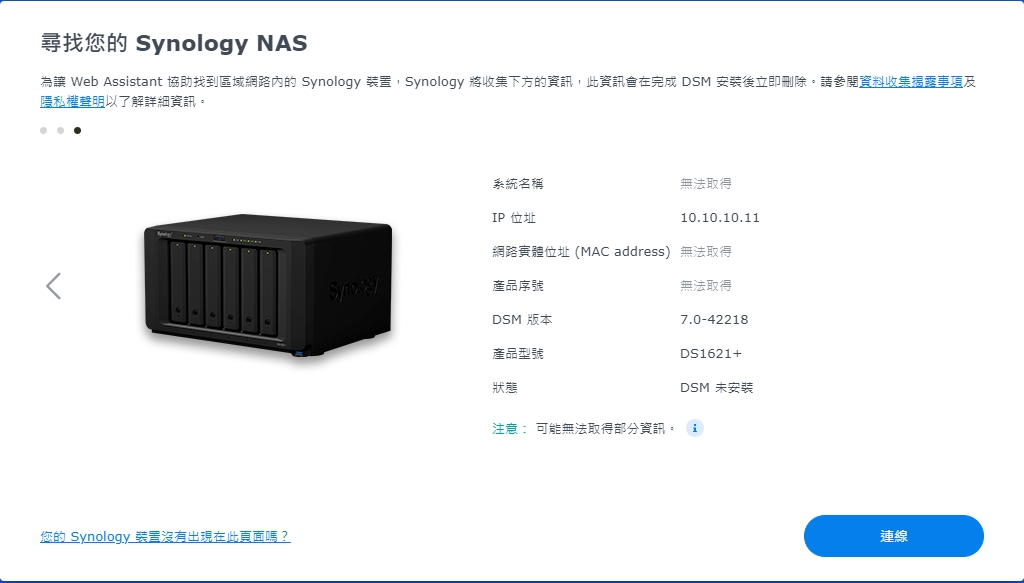
13. 開始安裝DSM
可以使用 http://find.synology.com/ 這個連結搜尋群暉的IP,或是進入路由器中查看IP。
按下連線後即可開始設定。
14. 其他事項
目前使用ARPL做的引導,都可以升級DSM至最新版,且不用重新編譯引導。
請問一下, Redpill Loader 安裝好 DSM 之後, 可以下載裡面很多軟體來使用, 其中裡面的 Virtual Machine Manager 能使用嗎? 我測試過 windows pro, ubuntu24.04.4 要安裝虛擬機, 都不行耶? 是安裝設定沒弄好, 還是得真的去買一個 VMM license 啟動它, 才能使用?? 試了老半天, 沒有一個能用的 ….
請問你有試過嗎? 我出現的問題都是, No Available Network. 但我看系統裡面就是有一個 Default VM Network (1000M)的介面(對外), 且DSM虛擬機都還能從外面連入操作並下載很多它內建的軟體倉庫的軟體下來使用. 唯獨 VMM 無法使用. 我選的是 [ 918+ ]
一定都可以用喔,建議選其他機型重新安裝測試,謝謝。